Dining Table Restoration In 5 Steps For A Newer Look!
The idea of restoring furniture from an old beaten piece to a newer look can be a nice way to refresh the room. Among many, you can say that the dining table is one of the easily beaten pieces of furniture thus making it a great option to restore. Thankfully, dining table restoration can be done in just five steps. It is pretty simple, as long as the situation is not that far gone. Here are the tips.
Step by Step Dining Table Restoration You Should Do
1. Cleaning the Table and Removing Varnish or Seal
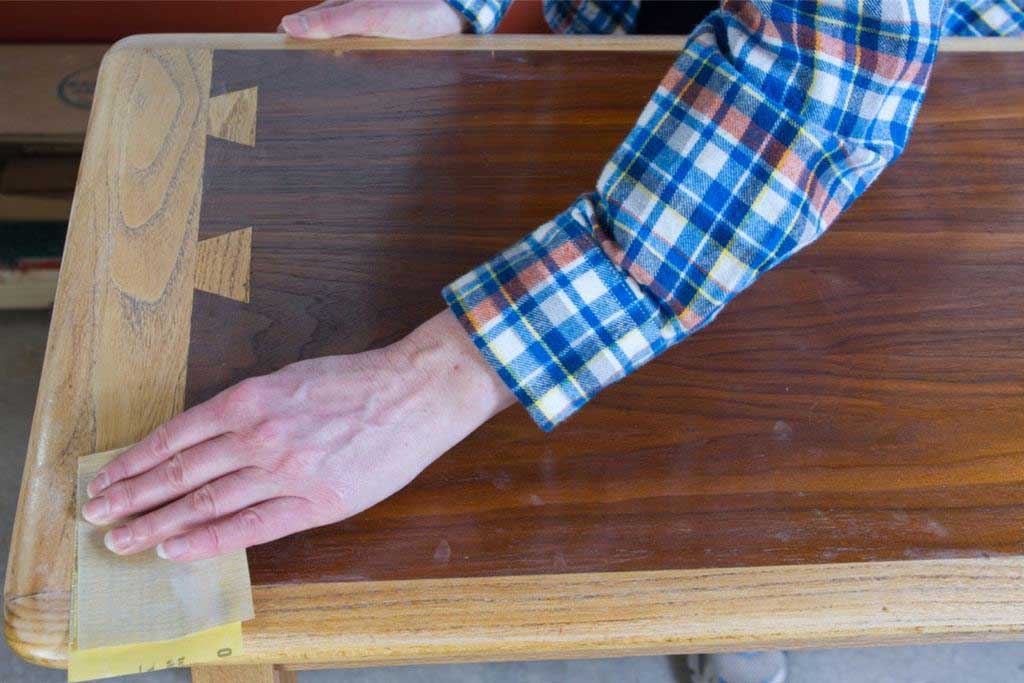
Restoring something should always start with cleaning the substance. You can use soap and water to remove the visible dirt and oils. Sometimes, you might also need to sand and strip the table from the previous varnish and paint. If you want to remove the seal or varnish, try to use 40/80 grit sandpaper to make it spotless.
2. Sand the Surface Smooth
After removing the seal, paint, and varnish, you can start removing the dust, wiping it, and sanding the raw wood. Due to the rough initial sanding, you will need to use long strokes and sands with finer grit sandpaper for the raw timer. To fully make the dining table restoration make sure the surface is silky smooth.
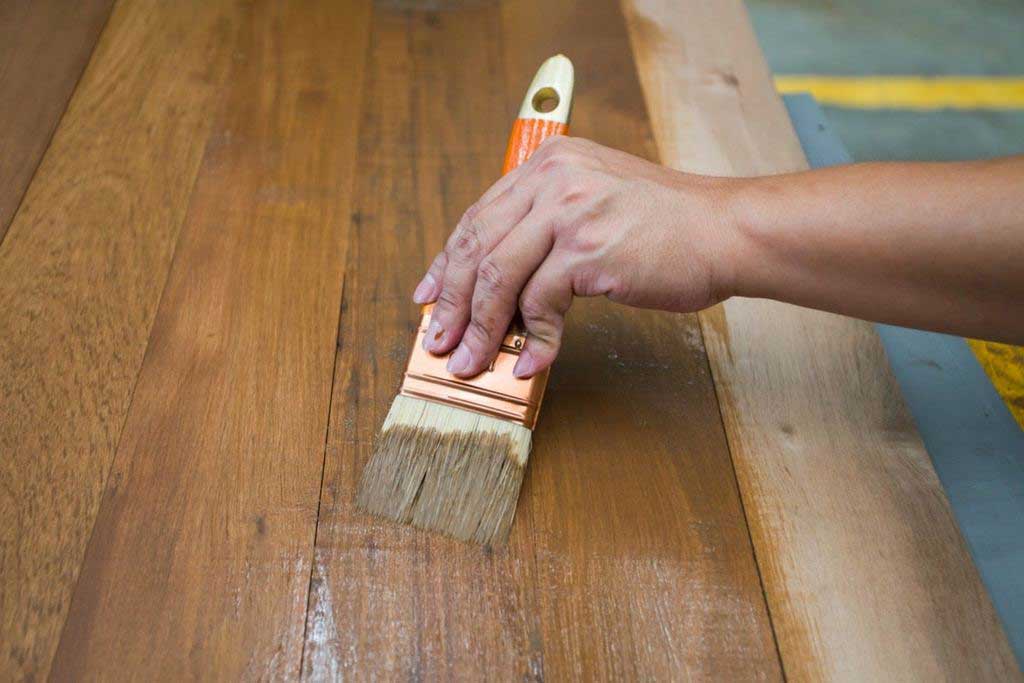
3. Layer with Stain
Applying stains can be another good option. If you do want to add stain, use a disposable brush and follow the wood’s natural grain. You can also apply the stain as you like, and try to soak and wipe the excess to reach some fine cracks around the table. Remember that stains can turn your table look darker. After that, you can sand it lightly.
4. Apply First Coat and Light Sand
Adding the first coat is the next step you should do. This is one thing where you add a light layer of coat or seal to avoid dust. Try to apply the seal with a firm stroke and small grain. Thus, the dining table restoration layer of coat and seal should be thin and even. After that, you will need to wait until the coat is completely dry.
As the first coat is dry, you need to once again sand the seal. One thing that you need to be careful about is picking the best sandpaper. In this step, make sure to use the 240 fine grit paper for a smooth sanding effect. Don’t forget to use a mask since the debris will be very small. Do it carefully to avoid removing the seal.
5. Adding Final Coat
In the end, you need to apply the finish. Remember that this step should only be done when the previous coat and stain are fully cured. Many will say you need at least two coats, but since you have done it before you only need to add a final with polyurethane or Tung oil. It will make the table look shiny and new after the dining table restoration.
Generally, it is a great effort to restore wooden dining tables to make them look better and younger. It does not need too much of actions, you can simply focus on cleaning, sanding, applying the coat, and staining. However, the idea should be enough when the condition is more or less about scratch, dent, or some dirt. If the table is fully broken, you need to put it together first.